How To Build Your Own Polytunnel to Grow Food All Year
Polytunnels seem to be popping up all over the place – and with good reason! They’re a fantastic gardening tool that can increase crop size, extend the growing season, and protect your plants from the elements. And, you get all of these benefits without the hassle that comes with erecting a permanent structure such as a greenhouse. Around 90% of people who purchase pre-made polytunnels choose to erect them themselves, because it’s incredibly simple to do, and can save a significant chunk of cash compared to hiring a handyman or builder to do it for you. So here’s an easy guide to walk you through the process of building your very own polytunnel.
What Is a Polytunnel?
Basically speaking a polytunnel is constructed from a metal-framed semi-circular tunnel covered in hardwearing polythene with UV inhibitors to maximize its lifetime. A large amount of air is enclosed by a polytunnel, so it stays warm much longer than a greenhouse – and also does not suffer from such dramatic temperature fluctuations in summer. During the winter you can regulate temperature and maintain heat very simply by lining the inside of the tunnel with bubble wrap and then removing it in spring. The polythene film has a lifespan of between five and ten years, but the cost to replace it will be only 15%-20% of the cost of the original tunnel.
Lay the Foundations
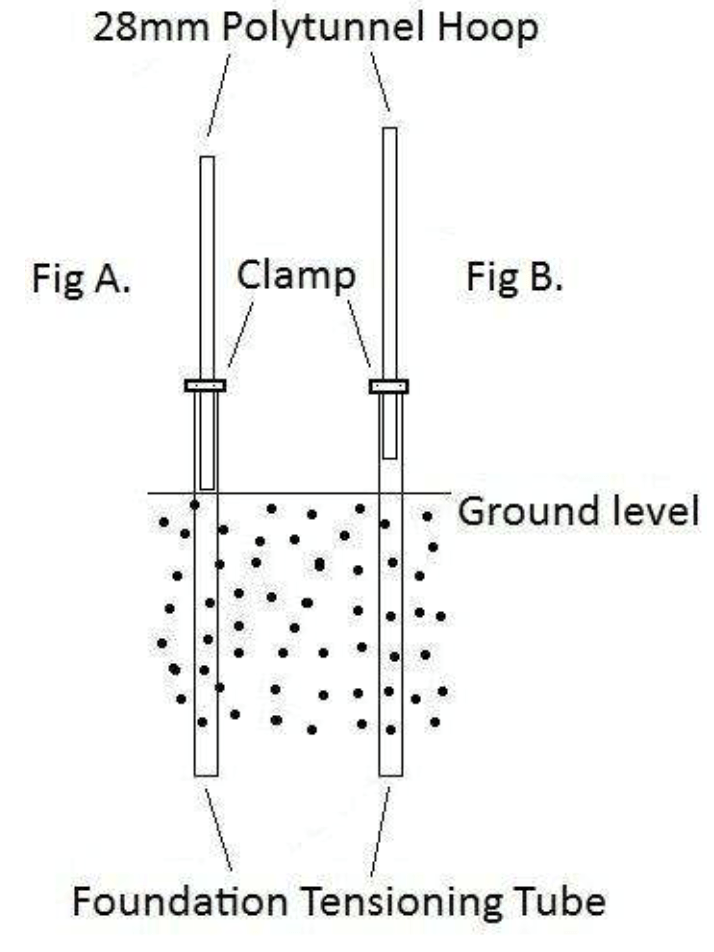
As with building any structure, you need to start by laying the foundations. Correctly placed foundation tubes are absolutely vital to the safety and longevity of your tunnel, so it’s crucial to get this step right. Start by marking the base positions around the site of the polytunnel – these will form the outline of the tunnel and will provide the base structure for you to build your aluminum frame. You should make sure the positions are evenly spaced and that the corners are at right angles, otherwise your tunnel might not be stable. You should then simply drive the foundation tubes into the ground at those marked positions. You can do this with a large hammer – but make sure to place a wooden block between the hammer and the tops of the tubes to avoid damaging or distorting them. You can either use tubes provided in a pre-fabricated polytunnel kit, or if building your own tunnel from scratch, offcuts of scaffolding poles or mains water pipe provide the perfect inexpensive substitute. These should be cut to about six feet in length and driven into the ground to a depth of about three feet, depending on your desired polytunnel size. The bigger the tunnel the deeper the poles should go. Once they’re securely in the ground, check to be sure the tubes are level with a spirit level.
Build the Frame
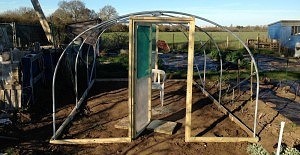
Whether you’re constructing a pre-fabricated polytunnel or building one from scratch, you’ll need a series of aluminum hoops to make up the frame of your tunnel. To build the frame, simply connect the hoops together (they generally come in multiple sections) and simply slide them over the foundation tubes, bolting each in place. Finally, fit the ridge pole down the centre top of the tunnel, corner bracing and doorframes. Check that the hoops are all straight and in line, then tighten all the joints carefully.
 Add the Cover
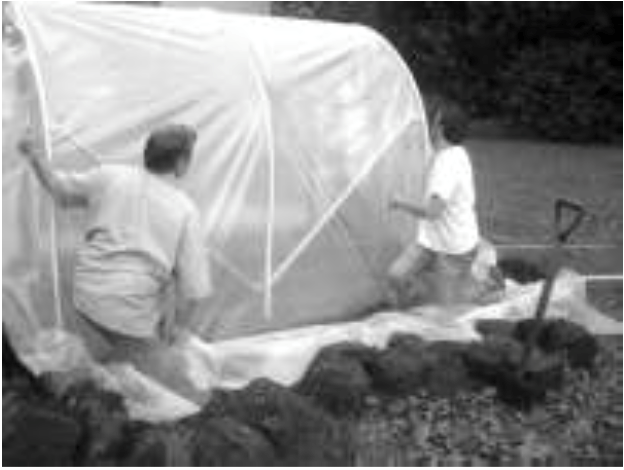
Now your framework is securely in place, it’s time to attach the cover and add the ‘poly’ to your tunnel. Most pre-fabricated polytunnels will come with some sort of cushioning to put over the hoops, to ensure the polythene sheet doesn’t snag or tear – but if you’re building one from scratch you can use foam coverings or anti hot-spot tape (which can be sourced from larger garden stores). This isn’t absolutely vital, but will increase the lifespan of the sheet by around a year – so it’s a good investment. Clear any stones from the ground around your frame and unroll the cover, sliding it over the hoops so it sits evenly over the frame. To secure it you can either attach it to the base rail if you have one (as most pre-made kits will), or simply bury a skirt of polythene in a trench approximately 30cm deep. If your model is supplied without a base rail, but you don’t have space to dig a trench, you can make one using lengths of 70 x 45mm timber, cut to length, then bolted on to the foundation tubes. Whichever you choose it’s important to keep the plastic sheet as taut as possible during fitting. Now simply either cut a V shape in the sheet where you’d like the entrance to be, or use whichever door system is provided in your kit. There you have it, your very own polytunnel!
Be sure to check out our website, premierpolytunnels.co.uk