Playing online casino Malaysia through Alibaba33 online casino Malaysia can be a fun and rewarding experience for those who enjoy playing games for fun. trusted online casino malaysia alibaba33Bet on your favourite slots, live, sporting events and win big! If you enjoy sports, slots like Mega888 ewallet Alibaba33 online casino Malaysia has something for you.

Viagra Malaysia treat erectile dysfunction with the original ED treatment that has helped men feel confident in bed for decades. We’ll connect you with a licensed viagra malaysia healthcare provider to evaluate if our prescription ED treatments could be right for you, including super-affordable generic Viagra viagramalaysiaofficial Viagra is an oral ED medication that works by suppressing an enzyme in the body called PDE5.

Tag: DIY - Organic Lifestyle Magazine Tag: DIY - Organic Lifestyle Magazine

How to Make an Herbal Extract Tincture – Easy Step By Step Guide

There are many variations to the following, but the basic procedure here will get you through just about any situation when it comes to making any kind of herbal extract you’d care to.

  1. Fill a blender half full with the herb or herbs of your choice (any kind of blender will do in a pinch, but Vita-Mix blenders are the best).
  2. On top of these herbs, pour out some 100-proof vodka.  In an emergency you can even use whiskey, brandy or any strong alcoholic hard liquor – Everclear cut 50/50 with distilled water is the best, followed by vodka as these are pure grain alcohols diluted with distilled water only.  Other hard liquors have sugar and other ingredients in them so don’t work as quite as well. Don’t let that stop you in an emergency if all you’ve got on hand is Bailey’s Irish Cream, though. After you’ve poured it in, the alcohol liquid level should be 2 to 3 inches above the top of all the herbs in your blender.
  3. Blend the dickens out of it for a minimum of one minute up to a maximum of 2 minutes.
  4. Pour the mixed contents into a glass mason jar (these come in pints, quarts, and half gallons), put a lid on, and then store in a dark place.
  5. At least once a day, shake your mixture thoroughly.  Twice a day is best.
  6. After two weeks, strain off the top liquid into another mason jar, and then press the rest of your mixture using a beer press, or a potato ricer, and an organic cotton canvas cloth to act as a filter to strain out the particles.  You can also use the fanciest press around that money can buy = a Norwalk juicer.
  7. Store your tinctures in brown bottles and keep out of the light in a cool, dark place.  A top quality extract made with Everclear can last up to a hundred years or more stored this way.

You’re done!  That’s it!  That’s all there is to it!  You can also use pure apple cider vinegar instead of alcohol with certain softer herbs and veggies, but stay away from using glycerin (which is a lousy catalyst with very poor absorption characteristics).

Also check out DIY Organic Chamomile Tincture (image credit, great article as well), and Cannabis Tinctures 101 if cannabis is your thing, but the basics are the same.

Related Reading:


DIY House Cleaning Recipes – Much Healthier, Much Cheaper!

The website, Statistic Brain, claims Americans spend an average of 42 dollars a month on cleaning supplies. That’s more than 500.00 a year! Unfortunately, many of the cleaning solutions Americans buy are filled with chemicals that are bad for their health and bad for the environment.

Advertisements have convinced us that we need these miraculous cleaning solutions with their artificial scents. The truth is, we don’t. We are better off without them, and so is our budget.

Why not try some or all of the following ideas to clean your house without the toxins or the expense?

Related: 10 Items You Can Stop Buying and Start Making for Better Health

1. Floor Cleaner

A steam mop is a miraculous invention. Cleaning a floor with a steam mop is quick and easy, but steam mops are not safe for laminated floors. It is worth the effort to check out the warranty information on your particular floors before you choose a cleaning method.

For bamboo, laminate, and hardwood floors, you can damp mop with plain water, water with a few drops of essential oil, or water with vinegar added. (Ratio: 2 gallons of warm water to ½ cup vinegar.)

Linoleum, tile, and stone can also be cleaned with vinegar and water. The ratios vary according to preference from 1/4 cup of vinegar to a one-to-one ratio of vinegar to water. For a really dirty floor, try the following recipe:

  • 1/4 cup white vinegar
  • 1/4 cup baking soda
  • 1 tablespoon liquid dish soap (remember to choose a natural soap)
  • 2 gallons hot water
  • Add a few drops of essential oil, if desired

Rinsing is not required, but if streaking occurs, rinse. Click the link below for more information.

Related: How to Clean Your Floors with Homemade Non-toxic Cleaners Instead of Store Bought Chemicals

2. Dish Soap

Think about it. Do you really want to wash your dishes with chemicals? Why not make your own? Check out this recipe from Hello Glow.

Grease-Fighting Lavender Dish Soap

Ingredients

  • 2 cups water
  • 1/4 cup all natural soap flakes or grated soap
  • 1/4 cup castile soap
  • 2 teaspoons super washing soda
  • 1 teaspoon non-GMO vegetable glycerin
  • 30-40 drops lavender essential oil

Check out DIY: Grease-Fighting Lavender Dish Soap for detailed instructions.

3. Kitchen Cleaner

To be honest, most of the time all you need to do is wipe off your counter top with a damp rag or a soapy rag. But if you feel you really need to do more, you can make your own kitchen cleaner.

Just use equal parts of white vinegar to water in a spray bottle. If you like, you can add a few drops of your favorite essential oil.

Or to eliminate 99.9% of E.coli, Listeria, and Staphylococcus bacteria from surfaces mix:

  • 1 part vinegar
  • 1 part lemon juice,
  • 2 parts water
Related: Health Benefits of Apple Cider Vinegar & How to Make Your Own

4. Glass Cleaner

Use equal parts of vinegar and water in a spray bottle and buff dry with a lint-free rag to clean glass, windows, and mirrors.

5. Bathroom Cleaner

Use straight vinegar to kill mold and mildew, but for most of your bathroom cleaning, switch to baking soda. Just make a paste by adding water to baking soda to get the consistency you require. Scrub and rinse.

6. Clean the Refrigerator

Baking soda is great for this job, too. Not only does it clean well, it eliminates odors. Just make a paste, scrub, and rinse. Or pull out your spray bottle of vinegar and water. It works great to clean out the refrigerator, too!

Recommended: How to Regrow Your Favorite Herbs and Save Lots of Money

7. Clean the Oven

Oven cleaning is the worst! The chemical soup in oven cleaning sprays brings a whole new level of toxicity into your home. Instead of using one, scrape up a bad spill and wipe your oven with a wet rag. Then make a paste of baking soda and water or a paste of baking soda and hydrogen peroxide. Apply and leave overnight. Wipe with a wet rag the next day.

8. Laundry Soap

Wellness Mama offers recipes for both liquid and powder laundry soap. Here is the recipe with directions for their liquid version.

  • Grate one bar of soap with a cheese grater or food processor. (Dr. Bronner’s, Ivory, or another natural, unscented bar soap.)
  • Put grated soap in a pan with 2 quarts water and gradually heat, stirring constantly until the soap is completely dissolved.
  • Put 4.5 gallons of really hot tap water in a 5-gallon bucket (available for free in bakeries at grocery stores, just ask them) and stir in 2 cups of borax and 2 cups of Washing Soda until completely dissolved.
  • Pour soap mixture from pan into 5-gallon bucket. Stir well.
  • Cover and leave overnight.
  • Shake or stir until smooth and pour into gallon jugs or other containers.
  • Use ½ to 1 cup per load.

More at How to Make Laundry Soap (Liquid or Powder Recipe)

Related: Sustainable DIY Laundry Solutions: The Secrets Detergent Companies Don’t Want You To Know

9. Carpet Cleaner

Once again, vinegar comes to the rescue. Just use the same 1:1 ratio of vinegar to water for spot cleaning or in a carpet cleaner to clean the whole rug. Add lemon oil or another essential oil of your choice if you want a particular scent.

10. Air Fresheners

Conventional air fresheners are another huge health issue. Chemicals from conventional air fresheners are linked to depression, endocrine disruption, asthma, cancer, genetic disorders, and birth defects! If you have any, throw them away!

To add a pleasant scent to your home, boil orange or lemon peels in water, cut and display fresh flowers from your garden, or use essential oils. You can use a diffuser or simply add a few drops of oil to a spray bottle of water and spritz it into the air.

Recommended:
Sources:


Make Chocolate Healthy Again: Fast and Easy DIY Homemade Chocolate

Few foods can induce a craving like chocolate. From its aroma to how it melts in your mouth to what it does for your body — the whole experience is heavenly. The effects of chocolate are experienced by everyone, not just chocolate lovers.

In fact, studies have found that the unique smell of chocolate changes our brain activity and makes us more alert. Once the chocolate is consumed, its flavonoids work as prebiotics and improve digestive health. The flavonoids that make it into the blood stream help improve your insulin sensitivity, lower blood pressure, and prevent plaque from building up in your arteries.

Chocolate contains a unique combination of caffeine and theobromine as well. These two work together to protect brain function and improve mood without causing the sleep disturbances or other side effects caused by caffeine consumption.

After reading about all of the good that chocolate can do for us, you may be tempted to head to your corner store and buy some right now. But before you do, it is important to know and understand that most chocolate bars are terrible for your health.

Most Chocolate Bars are Unhealthy

The most popular form of chocolate is milk chocolate. Most milk chocolate bars only contain about 11% cacao with the remaining ~90% of the bar consisting of milk, sugar, and other unhealthy ingredients. If these chocolate bars were named honestly, they’d be called “Chocolate Flavored Sugar-Milk Bars”.

Not so attractive now, huh?

On top of that, the milk binds to cacao antioxidants (including the flavonoids we talked about earlier) and renders them inactive. So when the sugar in the milk chocolate bar spikes your blood sugar and increases inflammation, the flavonoids can’t save you because the milk ingredients made them inactive.

Isn’t Dark Chocolate Healthy?

Most dark chocolate bars are only 60-70% dark chocolate, which means that that the rest of it is made up of processed sugar and other dubious ingredients like soy lecithin and milk solids. Even the 85% or higher dark chocolate bars shouldn’t be considered healthy. They are highly processed and still contain some milk products, sugar, and other additives in an effort to make the chocolate less bitter and more palatable.

If you come across a chocolate bar produced with minimal, unrefined sugar and simple ingredients like cacao and vanilla beans, then at least the chocolate likely has some health benefits — but it will cost you.

These bars are expensive! Plus the processing that they went through before becoming pretty little bars will render some of the antioxidants in the cacao inactive.

After learning all of this, we are left only one good option — to make our own chocolate.

How To Make Your Own Chocolate

That’s right, you can make your own chocolate!

The best part is you won’t need any fancy machinery, and it won’t take up to seven days to make it (like it does in most chocolate factories).

All you need is cacao powder and coconut oil. Look for raw, organic cacao powder for your health, and make sure it’s fair trade for the health of others.

Can’t Eat Chocolate? If you are sensitive to chocolate for any reason or just don’t want the caffeine it comes with, then replace cacao powder with carob powder. The carob-based chocolate will not taste too much like chocolate, but it will make a delicious and healthy snack.

Step 1 — Melt and Mix

Melt the coconut oil in a pan at the low heat. Once the coconut oil is completely liquefied, mix in the same amount of cacao powder until you have a homogeneous chocolate mixture. The lower the heat, the more you preserve the health benefits.

Use a 1:1 ratio of cacao powder to coconut oil.

I recommend starting with a smaller amount like a quarter cup of each. Once you develop a delicious recipe, however, all restrictions are off — make as much chocolate as you want.

Step 2 — Experiment and Solidify

Now that you have your chocolate liquid, turn off the heat source and add in whatever you want to be in your chocolate.

You can put in a sweetener, mix in some nuts and seeds for some crunch, or add in some cinnamon and vanilla powder to make it taste even better. Dried fruit— like dried blueberries, cherries, goji berries, and mulberries — is another ingredient option that will add more flavor and health benefits to your chocolate.

Once you finish mixing in your extra ingredients, pour the mixture into a plate, cookie sheet, or container, and put it in the fridge until it solidifies (2-4 hours).

Step 3 — Eat and Enjoy

Go to the refrigerator, break off a piece of your chocolate, and enjoy.

Why Homemade Chocolate is Much Better Than Store-Bought Chocolate

Although it is easy to make chocolate at home, you may still be tempted to buy the dark chocolate on the grocery store shelves. This homemade variety will not look as “perfect” in that commercial way as store bought chocolate bars. The differing tastes and textures may take some getting used to for some, but it will taste amazing once you get your recipe down, and it will be so much healthier. In fact, if you are a frequent cocoa consumer, you’ll grow to prefer the taste of your homemade chocolate very quickly, and then you will probably despise pretty much everything else out there.

Coconut Oil — One of the Healthiest Sources of Fat

Coconut oil is the perfect fat to use when making chocolate because it solidifies and melts in your mouth like a typical chocolate bar. But this isn’t the only reason why it is part of our chocolate recipe.

Coconut oil has the highest percentage of medium chain triglycerides (MCTs) than any other fat source. But MCTs are technically saturated fat, so doesn’t this mean that they are “unhealthy”? This is where some knowledge of biochemistry comes in handy.

There are many different types of saturated fats, and they are processed by the body in different ways. MCTs (fats with 6-12 carbon atoms) are different from the long chain fatty acids (fats with more than 12 carbon atoms). This is because most of the MCTs are transported directly to the liver after digestion rather than flowing throw the lymph system of the body like long chain fatty acids.

Once the MCTs reach the liver they are converted into energy and other metabolites. These metabolites include ketone bodies, which can be used by the brain and heart as an immediate form of energy. The MCTs in coconut oil can also increase your feeling of fullness for a longer period of time.

Related: 35 Things You Could Do With Coconut Oil – From Body Care to Health to Household

Erythritol — The Safest Sugar Alternative?

Erythritol is considered by many to be the safest low-calorie sweetener. It is a sugar alcohol that is less sweet than sugar (70% as sweet as sugar), so it will not stimulate your appetite as much as sweeteners like sucralose (these artificial sweeteners do far more harm than good). There is debate amongst the natural health community, and within this magazine, as to whether or not stevia is a safer choice for most, or if erythritol is a better option. It likely depends on how you use them and your own gut health.

Studies have shown erythritol can cause nausea and stomach discomfort. These side effects were only found in people that consumed 50 grams of erythritol in one sitting.

To give you some context, 50 grams (about 4 tablespoons) of erythritol has the same sweetness as about 40 grams (3 and 1/3 tablespoons) of sugar. This is 16 more grams of sugar than you will find in a typical 1.55 ounce “Sugar Milk Bar with Chocolate Added”. One to two tablespoons of erythritol should be more than enough to make your homemade chocolate more palatable without getting any side effects.

But this doesn’t mean that you should buy any sugar alcohol or any form of erythritol and assume that it will be safe. Other sugar alcohols like xylitol tend to cause more side effects at lower doses than erythritol, and erythritol is commonly made from GMO cornstarch. If you don’t want a dose of negative side effects, GMOs, or pesticides with your sweetener than it is best to use non-GMO erythritol.

I like to use a small amount of erythritol, a tiny bit of stevia, and some raw honey for sweetening. I also like to mix the chocolate with the carob which has a natural sweetness to it. I don’t like it very sweet, and I like to throw in ginger, cayenne, cinnamon, and/or other herbs that can help keep the gut balanced. I like my chocolate to have quite a bit of kick to it, just like my smoothies. Be careful and patient with the honey. It’s even easier to cook the benefits out of honey than it is with chocolate. I don’t think erythritol is particularly good for you, and while raw honey has plenty of health benefits, for good health it should be eaten in very small quantities. I find the mix of the three works well for my tastebuds and my body.” – Michael Edwards

The Importance of Raw Organic Cacao Powder

Even if you don’t like the taste of chocolate, you may want to consume cacao powder as a way to reap all of the benefits that we talked about earlier in the article.

To ensure that you get all of the health benefits of cacao, it is best to buy raw organic cacao powder. Quality cacao powder is important because most cacao powders (and the cacao used to make chocolate) are processed with heat and alkali, which destroys cacao’s health-promoting antioxidants.

But what do you do if you want to keep caffeine and chocolate out of your diet?

The Many Benefits of Carob-based Chocolate

Although this article praises the medicinal properties of cacao, this doesn’t mean that you are missing out if you don’t eat it. In fact, carob powder may have even more health benefits than cacao powder. For example, carob powder is most well-known for its anti-diarrhea effects, but that is not all this delicious powder has to offer.

Like cacao powder, carob powder contains many flavonoids. One of the flavonoids it contains is quercetin, which is known to reduce allergy symptoms, prevent heart disease (like cacao’s flavonoids do), and protect against cancer. Carob powder also contains a compound called gallic acid which is known to scavenge free radicals and kill cancer cells.

If you compare these benefits with cacao powder, carob powder looks like it could be the winner here. After weeks of experimenting with using carob powder in smoothies and other recipes (that I usually put cacao powder in), I completely agree. Healthy dark chocolate tends to over-stimulate me, but when I use carob powder instead, I feel more satiated and energetically balanced.

Recommended Reading:
Sources:


How to Regrow Your Favorite Herbs and Save Lots of Money

It’s so easy to get food – just go to the store, find what you want, come back home, prepare it, eat it, and repeat. But what if you just had to go to your windowsill?

Although many fruits and vegetables won’t fully grow on your windowsill, many of your favorite herbs can easily be grown in your house and your garden, so you will always have an abundance of herbs available.

Herbs will not provide you with all the calories that you need to survive, but they are packed with what you need to thrive. They have more vitamins, minerals, phytonutrients, flavonoids, and phenolic compounds than almost any other fruit or vegetable, which make them flavorful and medicinal at the same time.

Featured image credit and cool DIY project: Window-Mounted Hanging Herb Garden

How to Grow an Abundance of Herbs

In this article, we will focus on how to regrow herbs from kitchen scraps with as little effort as possible. It all starts with buying the herbs that you want to grow from your local organic grocery store, and if you are successful at growing them you will never have to buy your favorite herbs again.

Reocmmended: How to Eliminate IBS, IBD, Leaky Gut

Mint

This herb is most commonly consumed as herbal tea, but it also can be added to dishes like raw carrot salad or cacao-based deserts to make it more flavorful. Mint may help relax your gastrointestinal tract, improve the health of your nervous system and immune system, and prevent cancer. To grow it yourself and get all of these benefits, all you need is a healthy mint stem with leaves.

Here’s how you grow it:

  1. Pick a healthy 3-inch stem with leaves from your bundle of mint. Remove the lower leaves for use in your recipe, but leave a couple healthy leaves on top.
  2. Put the stem in a glass of water on a windowsill that receives plenty of light. When the water starts to look murky, dump it out, and replace it with fresh water to keep your plant healthy. Your mint will develop roots within a couple of weeks.
  3. Once your mint’s roots have grown in, plant it in a pot with soil and water it enough to keep the soil moist.

Tips:

  • Choose an indoor or outdoor location where it receives morning sun and afternoon shade.
  • Mint spreads easily and can take over your garden, so it’s best to grow it in its own pot.
  • Harvest the mint leaves before it flowers.
  • Extend your harvesting season by pinching off the flowering buds as they appear.

Lemon Balm

Lemon balm is a member of the mint family and comes with many of the same health benefits as mint. It was used as far back as the Middle Ages to reduce stress and anxiety, promote sleep, improve appetite, and ease pain and discomfort from indigestion.

Follow the same steps as you do to grow mint.

Tips:

  • It grows best in full sun and will tolerate shade.
  • It prefers slightly moist soil.
  • It will die back to the ground in freezing weather, but regrow from the roots in spring.

Basil

Another member of the mint family, basil is one of the most popular herbs used in cooking across cultures. Not only does it make sauces, curries, and even watermelon taste better, it also fights bacteria, viruses, and chronic diseases.

Here’s how you can grow it:

  1. Take a 4-inch basil cutting right below a leaf node, and remove the leaves off of the basil cutting about 2 inches from the end.
  2. Put it in a glass of water and keep it in your house where it can get sunlight throughout the day.
  3. Change the water every few days.
  4. When the roots grow 2 inches or longer in about two to four weeks, put it in a planter where it can get direct sunlight.

Tips:

  • Grows very fast in 80 to 90 degree Fahrenheit weather.
  • Harvest leaves by pinching them from the stems after the plant has reached 6 to 8 inches.
  • Harvest all the basil before the first frost.
  • Freezing basil best preserves its flavor.
  • Always cut leaves from the top of the plant to encourage more leaf growth and to discourage the plant from seeding.

Rosemary

Most of us can tell when rosemary is around because of its potent fragrance, but do you notice the cognitive boost the smell can give you? Studies show that the smell of rosemary can improve our quality of memory and increase our alertness. The positive effects only increase when we consume rosemary because of its potent antioxidant activity. Add about a 1/2 teaspoon of rosemary to your roasted vegetables and you can increase their flavor while you boost your cognitive function.

To regrow your rosemary:

  1. Snip a sprig of rosemary from 2-3 inches off the top of a healthy rosemary sprig.
  2. Use the lowest leaves for cooking and keep the others that are further up on the sprig.
  3. Place the sprigs in a small glass with the stem fully immersed in water on a windowsill. Change the water every few days and rinse the stems at the same time.
  4. After about 2 months you will begin to notice roots coming from your rosemary sprig. Give the roots about 1 to 2 weeks to sturdy up before you plant them in soil.

Tips:

  • Rosemary takes time to grow. It should pick up speed in its second year.
  • Make sure it gets full sun and light, although partial shade is fine.
  • Let the soil dry out between watering.
  • Use mulch to keep roots moist in summer and insulated in winter.
  • Prune dead wood from the plant in the spring.

Thyme

Thyme has anti-inflammatory properties, making it the perfect herb to fight off diseases that are linked to inflammation like heart disease, asthma, arthritis, Crohn’s disease, Alzheimer’s disease, cancer, diabetes, and Parkinson’s disease. Simply put it in your soup, stew, or roasted vegetables to infuse your food with delicious flavor.

Rosemary and thyme grow similarly at first. You can start growing your thyme and rosemary in the same cup. However, once you are ready to plant them, put them in separate pots or areas of the garden. Thyme will grow faster then rosemary, and will need to be pruned by one third in the spring. It requires full sunlight just like rosemary.

Parsley

Parsley is packed with Vitamins C, A, and K. It also contains a flavone called apigenin, which can destroy cancer cells. To make the most of this herb you can add parsley to your vegetable juices or smoothies, or have it in salads, dressings, sauces, or soups.

Here’s how you can grow it at home:

  1. Cut a stem of parsley to around 3-4 inches long and leave a few leaves on the top for regrowth.
  2. Place it in a glass of water in a sunny spot on your windowsill.
  3. Transfer it into a pot with soil when roots appear.

Tips:

  • Parsley is a biennial, which means it grows for two gardening seasons then dies. The first year is when it produces the leaves that we commonly eat, and in its second year it goes to seed.
  • It grows well with annuals, perennials, and herbs in full sun or partial shade.
  • Don’t eat the leaves when the plant begins to flower, they will be bitter.
  • You can eat the parsley root as well. Cook it after its sliced or cubed like you would prepare turnips or parsnips.

Cilantro

One of the most pungent smelling and tasting herbs, cilantro is filled with  phytonutrients, flavonoids, and phenolic compounds that may help rid the body of toxic heavy metals like lead and mercury. It is also a good source of vitamins A & K, calcium, magnesium, and potassium. Add it to guacamole, salsa, or sauces to give them more flavor, or juice it and add it to your favorite vegetable juice.

Although cilantro grows better from seed, you can still grow a full plant in a few months from a cilantro stem cutting. Simply follow the same steps as you do to regrow parsley.

Tips:

  • Cilantro thrives in full sun and grows faster than most other herbs.
  • Harvest by cutting the leafy stems near ground level
  • Avoid cutting more than one-third of the leaves at one time.
  • For maximum flavor, chop the leaves and add them to your meal at the last minute.
  • To preserve flavor, store cilantro by freezing it in cubes of water or oil.
  • Let the plant self sow its own seeds and regrow itself or dry the coriander seeds and use them in curry, poultry, relishes, and pickles.

Sage

Sage is a natural antiseptic with preservative and bacteria-killing abilities. It adds a delicious flavor to almost any meat dish, and it can also be brewed as a relaxing tea.

Here’s how to grow it yourself:

  1. Cut a 1-2 inch long stem. Remove all leaves except the top ones.
  2. Place in a glass with the stem fully emerged in water. Place on a sunny windowsill and after two weeks roots should appear.
  3. Plant in soil.

Tips:

  • It grows well in medium to full sun indoors or outdoors.
  • Let the soil dry between watering.
  • For the richest concentration of their aromatic oils, harvest sage leaves in the morning, after the dew has dried.

Oregano

Oregano was revered as a symbol of happiness by the ancient Greeks and Romans, and for good reason. It contains antioxidants and phytochemicals that fight off common happiness destroyers like infections, inflammation, and cancer. Add to your favorite sauce or salsa, or you can use it as a medicine to kill off infections by drinking it as tea or making your own oregano oil.

Oregano is also one of the easiest herbs to grow at home:

  1. Cut a stem measuring 2-3 inches long; just below a leaf node. Remove all leaves except for the ones on the top, and cut off all flowers.
  2. Place the cutting in a glass with water covering at least one of the leaf nodes.
  3. When roots appear within a week, transfer the plant to a pot with soil.

Tips:

  • Only water the oregano when the soil is dry to the touch.
  • It prefers sun with a bit of afternoon shade.
  • Cut out dead stems in the spring before the plants begin new growth.
  • Begin harvesting as soon as the plant is several inches tall.
  • The herb has a stronger taste when it is dried than when it is fresh.
  • For a big harvest, cut the stems just above the plant’s lowest set of leaves. This stimulates new growth for another harvest in late summer.

Marjoram

Marjoram has one of the most subtle flavors of all the herbs we covered in this article. It is a member of the mint family, and a subspecies of oregano, so it comes with the digestive benefits of mint and the anti-bacterial, anti-fugal, and anti-viral benefits of oregano. This makes it a perfect addition to soups, sauces, and salads, as well as home-made skin care products.

Here’s how you can grow marjoram:

  1. Cut a stem a few inches long and remove all the leaves except a few from the top.
  2. Place in a glass of water with the waterline fully covering the stem.
  3. Transfer to soil when roots appear.

Tips:

  • Prefers full sun
  • Trim the plants when buds appear to ensure continued growth
  • Begin picking fresh leaves as needed 4 to 6 weeks after planting
  • Keeps its full flavor fresh or dry.

Lavender

If you want to calm your anxiety, just break off some lavender flowers, grind them between your fingers, and take in its aroma. Lavender is similar to rosemary because one sniff can change your state of being. However, lavender will sedate you and relax you rather then increase your alertness like rosemary.

Lavender also can help calm skin inflammation, so it will be a perfect herb to add to your homemade soaps and lotions. If you think you’ll like the taste of lavender then you can add it to roasted rooted vegetables and your favorite sweets like cookies, chocolates, and frozen deserts. Lavender goes especially well with honey.

Here’s how you can regrow lavender at home:

  1. In the spring, Cut 3-4 inches from the soft, pliable tips of new growth on a lavender plant.
  2. Remove all of the leaves from the lower 2 inches of the stem and then gently scrape the skin off the bottom portion of the stem on one side with a knife.
  3. Fill a small pot with a homemade mix of half vermiculite or perlite and half peat moss
  4. Stick the lower end of the cutting about 2 inches into the soil and firm the soil so that the cutting stands up straight. Cover with plastic to form a greenhouse-like environment for the cuttings.
  5. Remove the plastic when the cutting has roots. This will take two to four weeks.
  6. Set the plant in a sunny location and water it when the soil is dry an inch or so below the surface.

Tips:

  • Gently tug your lavender cutting to see if it has roots. If it resists the tug then it has roots. (Only tug the cutting once every 3 to 4 days.)
  • Put the lavender in a container with adequate drainage. Lavender doesn’t like to be damp.
  • It will grow best when it receives 8 hours of sun a day.
  • Lavender thrives in warm temperatures.

Garlic

Garlic is delicious to our taste buds and  spectacular for our health. It contains a miraculous compound called allicin, which prevents cancer, boosts our immune system, reduces blood pressure, and improves cholesterol levels. Garlic also helps reduce oxidative stress, heal inflammation, and detoxify heavy metals.

And it’s easy to grow:

  1. Separate the cloves from your organic garlic bulb.
  2. Plant them pointy sides facing up  two inches deep in the soil (pot or garden.)
  3. Harvest when the green tops begin to yellow and fall over. This will be in July or August in northern climates.
Related: Garlic – The Most Amazing Herb On The Planet

Tips:

  • Plant it a month before the ground freezes.
  • Fertilize it with nitrogen from things like crushed egg shells.
  • Cut off any flower shoots to encourage bulb growth.
  • After harvest, let the bulbs cure in an airy, shady spot for two weeks.
  • Save your largest, best-formed bulbs to regrow in the fall.
  • Northern gardeners should mulch heavily with straw for over-the- winter outdoor gardening. Remove mulch after the threat of frost has passed.
  • Water every 3 to 5 days from May through June.
  • Ensure they get full sun.

Ginger

Ginger is commonly known for its ability to treat indigestion and nausea, but it also contains potent anti-inflammatory compounds that can prevent heart disease and reduce the symptoms of osteoarthritis. You can easily make it into a delicious tea or supplement with a slice of ginger with every meal to promote digestion and gain its other healing effects.

Ginger can easily be grown in its own pot indoors. Here’s how:

  1. Find an organic ginger root that is plump with tight skin, not shriveled and old. Soak it overnight in warm water to get it ready for planting.
  2. Stick the ginger root with the eye bud pointing up and cover it with 1-2 inches of soil, and water it well.
  3. Keep the soil moist, and make sure the ginger is in a reasonably warm area that doesn’t get too much direct sunlight. After a few weeks, you will see shoots popping out of the soil.
  4. Small pieces of ginger can be harvested 3-4 months after growth begins. Just cut off what you need and place it back in the soil to regrow.
Related: The Amazing Herbal Power of Ginger

Tips:

  • Ginger grows well in partial or full shade, making it a great indoor plant.
  • If your root has several eye buds, it can be cut into pieces, and each bud can be placed in a separate pot to produce several plants.
  • Ginger thrives in shallow and wide pots.
  • If you prefer a larger harvest, take ginger out of the soil when the plant begins to die back, and replant the healthiest looking ginger.
  • If you need a slice of ginger, you can slice a piece off at any time and replant it.

What To Do With All These Herbs?

If you put these steps into action you will be rich (in herbs). Each one can be used in a variety of ways, and when you have more than enough you can start donating them or you can make them last for 1 to 3 years by dehydrating them.

Related Reading:

Sources:


How To Make Natural Body Butters That Actually Moisturize Your Skin

“Love the skin you’re in.” Though it may be cliche, take a moment to think about why you wouldn’t want to take care of your body’s biggest organ. After all, your skin is one of the first things others notice about you, so it pays to keep it in the best shape possible.

There’s just one problem. Most of us do a pretty terrible job of tending to our skin. Sure, we slather on some sunscreen on a hot summer day or casually rub in lotion during winter dry spells, but few people take the time to think about what’s really going on their skin. That’s a mistake. Your skin does more than look pretty, it’s actually a natural barrier, the first line of defense that keeps toxins from the outside world from getting inside you. However, your skin is far more permeable than most people notice.

Think of a nicotine patch. It works by allowing trace amounts of addictive chemicals to be absorbed directly through the skin and into the bloodstream. Just as skin is no barrier against a flood of nicotine, it also doesn’t prevent any other chemical from going through. This means that any chemical product you put on your body (bug spray, lotions, makeup) have every possibility of flowing through your bloodstream.

If that doesn’t scare you, it should.

Using Conventional Lotions? Think Again.

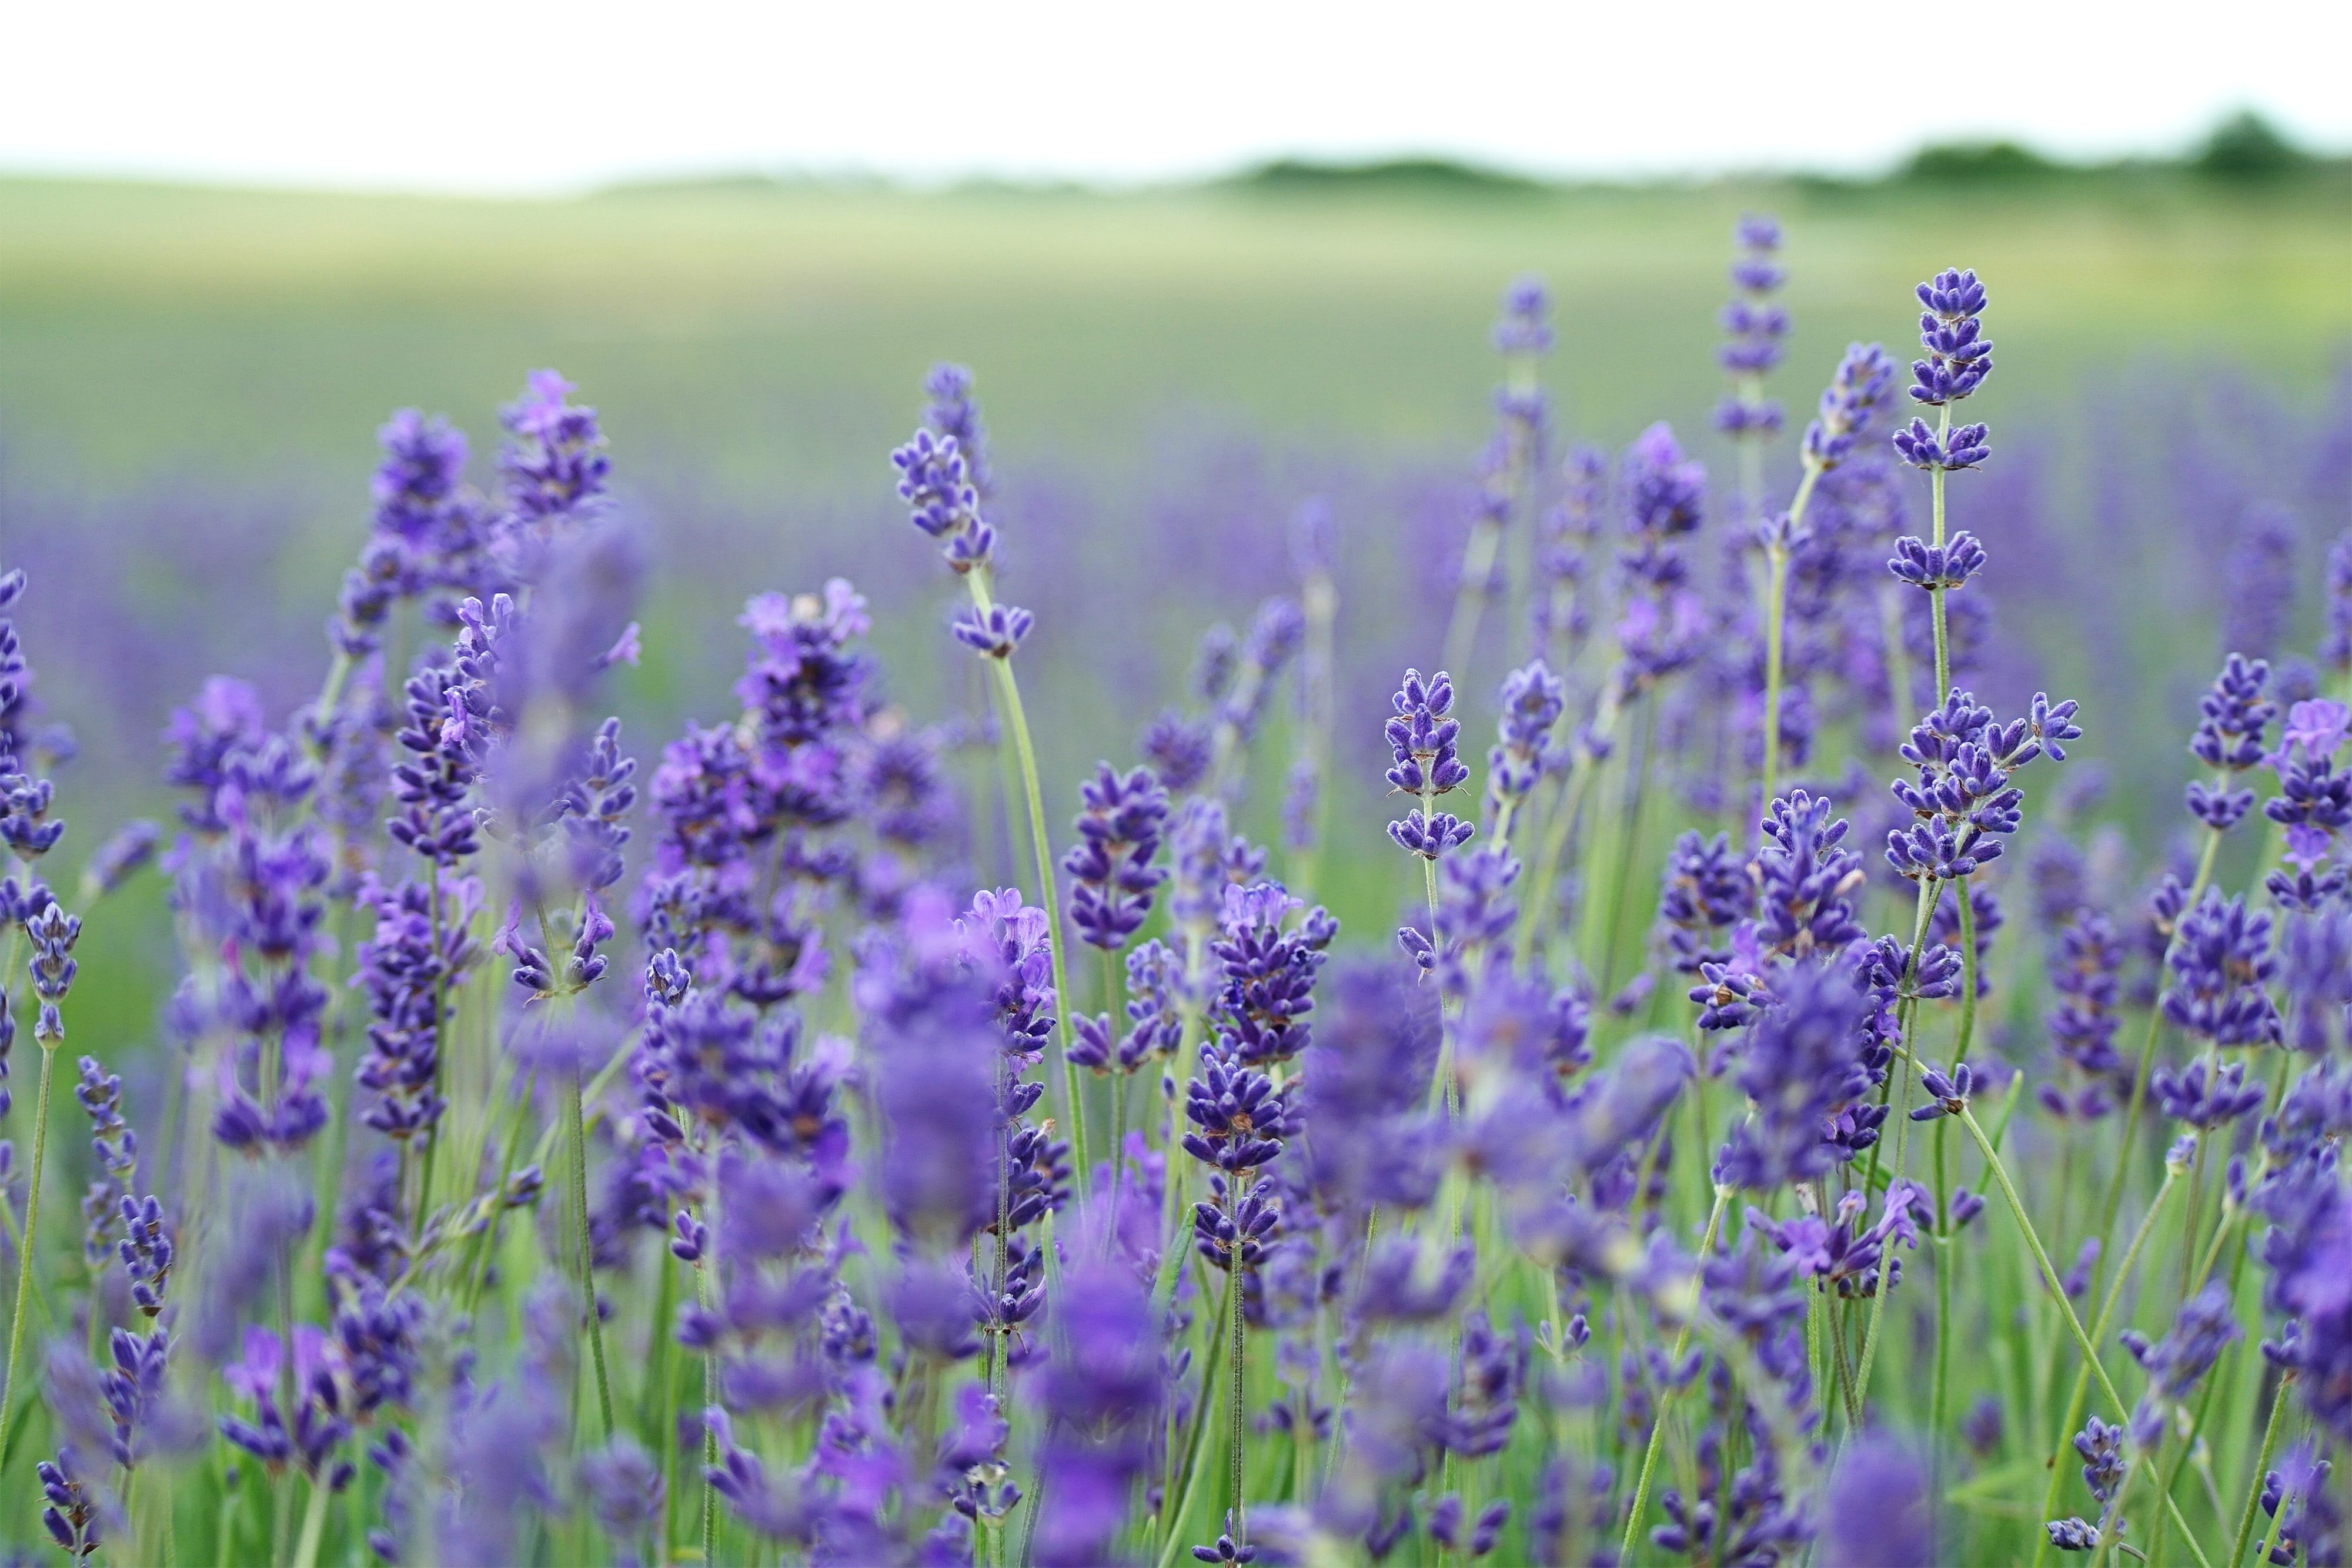
In today’s world, smelling amazing is no guarantee that something’s actually good for you. Your lavender scented lotion might be a pretty purple color and even come with flowers on the label, but chances are that most of the contents of that bottle never came close to a plant.

Below are some of the common chemicals used in conventional lotions and their effects on your body and the planet.

Paraffin: Made from petroleum, this chemical is known for coating your skin in a thin plastic covering, clogging pores and building up toxins along the way.

Parabens: A common cosmetic preservative in over 10,000 beauty products, parabens have been shown in studies to have connections with cancer, and they disrupt your body’s endocrine system by mimicking the hormone estrogen.

Propylene Glycol: Used as a moisturizer in many lotions, propylene glycol has been shown to inhibit skin cell growth and cause irritation, and some evidence points to it causing kidney and liver abnormalities.

Sodium laurel sulfate: Over 90% of personal care products have some form of sodium laurel, a chemical known for breaking down your skin’s moisture barrier so that it (and other chemicals) can easily get into your bloodstream. Studies have shown that SLS can lead to hair loss.

Ready to exchange these icky products for something a little less toxic? Keep reading to learn about the importance of taking care of your skin the natural way.

Natural Body Butters: The Quality Comes from the Ingredients

When it comes to taking care of your skin, nothing can compare to a natural body butter. Actually, “body butter” is a general term used to describe dozens of different body creams that are dense and full of nutrients that add extra hydration to your skin. Most body butters are filled with essential oils, vitamins, and nutrients that make them invaluable in a skin care routine. There is a huge range of ingredients that can be used to make body butters, all of which have distinct benefits that make them useful in a variety of ways.

In most cases, body butters are made from cold pressed oils that are extracted from nuts, seeds and fruits, and then combined with fatty acids and other forms of oil to thicken the consistency. Most body butters are solids at room temperature that melt from your skin’s heat when you slather them on, creating a deeply moisturizing treatment that lasts for hours.

Some of the best benefits of natural body butters are described below.

  • Plenty of Moisture: Skin sucks in everything you put on it, but thankfully natural body butters will provide nothing but hydration. Nut-based butters are filled with emollients that provide skin soothing moisture long after conventional lotions have quit.
  • Protection: The thick ingredients in body butters form a protective barrier over your skin to keep moisture in check. This prevents you from drying out in heat, hot sun or cold winter air that otherwise sucks away moisture. Instead of relying on parabens like other products, natural butters take advantage of the natural emollients found in nuts and seeds to trap moisture deep into the fatty layers of your skin for optimal moisture protection.
  • Skin Nourishing Vitamins: No matter the type, body butters are rich in omega 3 fats that benefit you both inside and out. These highly moisturizing fatty acids help keep inflammation in check and make vitamins far more accessible for your skin to absorb.
  • Reduce Wrinkles: Allowing your skin to dry out is a quick way to start looking old and faded. A better option is to protect yourself with moisturizing body butters that help your skin retain its elasticity so you keep a healthy glow, no matter your age.
  • Softer Skin: Chronic, chapped skin is no problem when combated with the moisturizing power of homemade body butter. Regular treatments of this rich cream can eliminate dry, cracked skin and even clear up chronic conditions like eczema. Just slather on some body butter immediately after showering and your skin will stay noticeably softer throughout the day.
  • Affordable: Are you currently paying a small fortune for your skin care products? Switching over to homemade body butters will save you money, and you’ll get to control exactly what goes in them.
  • Cuticle Saver: If your cuticles look ragged much of the time, a gentle coating of body butter will help them stay hydrated and healthy, getting your nails back to top shape in no time.
  • Stretch Mark Solution: Having children can be brutal for your body, but a little body butter can make those scars a little less visible. Regular treatments of body butter help the skin to heal and regenerate, which means you can hide the appearance of stretch marks before they get out of control.

Top Ingredients for Making Homemade Body Butter

There are so many ways you can make your own body butter, you’re truly limited only by your creativity. Whether you choose to stick to staple ingredients like coconut and shea butter or opt for something a little more exotic like cupuacu or jojoba butter, the possibilities of what you can do is endless.

While it’s usually best to plan on using a ration of 75% solid to 25% liquid oil for your natural butter, the oils listed below are some of the best to invest in when first getting started.

Almond Butter: You want to lick yourself all day when you make a butter with sweet almond oil. This thick, rich butter is great for moisturizing and is a smart way to hydrate a dry scalp.

Cocoa Butter: Known for being a highly stable fat, cocoa butter can last on your shelve for years and is flush with natural antioxidants. A silky smooth texture and delicate fragrance makes it useful for a wide range of products, and pregnant women have been relying on cocoa butter to prevent stretch marks for centuries. Because of the high moisture content of cocoa butter, it’s not always a great choice for oily skinned people.

Shea Butter: Definitely one of the most popular butters available today, shea butter has a unique fatty acid composition that makes it versatile for many products, including dry skin, massage creams, and sun protection. A great all around oil, everyone can benefit from a little shea butter in their life.

Jojoba Butter: If you need an intensive moisturizing boost that only the best can get you, jojoba oil is worth checking out. Perfect for treating eczema and psoriasis, jojoba oil works well on all skin types.

Coconut Oil: With a melting point so low it’s practically a liquid at room temperature, coconut oil gives your body a delicious tropical smell and is great for treating troubling dry spots.

Cupuacu Butter: Made from the cupuacu fruit (commonly grown in Brazil) cupuacu butter is a perfect ingredient to add to your homemade hair conditioner, though it should be used sparingly on your skin if you tend to be oily.

Two Ways to Make Your Own Natural Body Products

Interested in making your own body butter? These recipes will get you started!

Extra Hydration Body Butter

You could truly spend weeks trying out recipes for different types of body butter, but for your first batch, you’ll want to go for something as nourishing as possible. This recipe combines four types of butters into one batch in order to get you maximum skin hydration. Great for babies or anyone with sensitive skin, this butter also makes a good gift.

Take half a cup each of shea butter, mango butter, coconut oil, and olive oil, and combine them all into a double boiler on medium heat. Stir the mixture constantly until it all melts and remove it from the heat. If you’re looking for a particular scent, you can add between 10 to 30 drops of essential oil. Put the entire mixture into the fridge and let it cool for an hour, or to the point where it starts to harden but is still pliable. Take a hand mixer and whip the batch for 10 minutes until fluffy, after which it should be put back in the fridge for 10-15 minutes. Once set and somewhat hardened, you can store your butter in a glass jar with a secure lid and use it like any regular lotion. So long as your home is less than 75 degrees F, the butter will stay whipped. Any hotter than that, and you should store it in the fridge between uses.

Homemade Hand Lotion:

While not truly a body butter recipe, this lotion uses all natural ingredients for a hydrating blend that is too good to miss out on. Body lotion and body butter are more similar than they are different, but the difference comes from the liquid content. Lotions sometimes contain up to 70% water, and the moisturizing effects don’t go as deeply or last as long as body butters. Even so, lotions are great when your skin needs a quick pick me up but doesn’t want all the excess hydration of a true body butter.

Instead of water, this recipe relies on oil for its texture, making it more hydrating than other versions. To make your own lotion, combine a half cup of liquid oil (almond works well), with a quarter cup each of coconut oil and beeswax. Melt them together in a double boiler, stirring constantly so nothing burns. Once everything melts, add a teaspoon of Vitamin E and a few drops of essential oil. Pour the mixture into a glass jar with a tight fitting lid, and dip in whenever you need an extra hydration boost. This product is best used within six months.

Simple Tips For Using Natural Body Products

Using body butters and lotions is a fairly straightforward process. In essence, you put a little butter on your hands and rub it in where you want it. Even so, the tips below can help answer some of your questions about use.

  • Body butters are super concentrated, so a little goes a long way. Take a tiny amount and carefully warm it with your hands before putting it on your body so that it absorbs more easily into your skin.
  • The kinds of butter you purchase for your body butter is crucial. Look carefully on labels for terms like “unrefined,” “crude,” and “cold pressed,” as these are signs that the oil was extracted through natural methods, not high heat that destroys the butter’s natural nutrients.
  • So long as you store your butter in an airtight container, it should last for a year or more.

In Summary

Your skin does a lot for you, so it pays to take care of it. By relying on natural skin care remedies like body butters, you’ll be keeping your body’s biggest organ in top shape. Add some homemade body butter to your skin care routine, and your skin will stay hydrated, healthy and beautiful, at almost no cost to you.

Recommended Reading:
Sources:


You Need Sulforaphane – How and Why to Grow Broccoli Sprouts

Brain Enhancing, Fat Burning, Cancer Preventing, DIY Homemade Supplementation

It is not another drug or folk remedy. You can prevent many forms of cancer, improve gut health, establish healthy body fat composition, enhance brain function, detoxify your cells, and reduce depression with this one miracle compound.

It’s called sulforaphane, and it is naturally produced when cruciferous vegetables are damaged. We initiate the reaction that creates sulforaphane with the process of chewing, which allows us to reap a plethora of benefits that make the scientific research on sulforaphane look like a late night TV ad.

The Scientific Sales Pitch

Although there are many proposed effects of sulforaphane, let’s stick with what has been studied. Sulforaphane has been shown to prevent the growth of many cancers including breast, prostate, colon, skin, lung, stomach, and bladder cancer. The risk of common diseases like diabetes, heart disease, gastric disease, neurodegenerative disease, ocular disease, and respiratory diseases are reduced with the consumption of sulforaphane as well. Even behavioral disorders like autism have been helped with sulforaphane supplementation. And if that isn’t enough, sulforaphane has been shown to decrease fat gain and improve body composition in mice. All this is possible because sulforaphane stimulates protective and detoxifying mechanisms in the cells. This allows the cells to eliminate environmental toxins like mercury and air pollutants from the body and repair themselves from the damage caused by oxidative stress.

The Best Source of Sulforaphane

With positive and protective effects on almost every cell in the body, sulforaphane is like a health insurance policy for your cells. This compound can be found in raw or minimally cooked cruciferous vegetables like broccoli, kale, cauliflower, and Brussels sprouts.

It is important to note that sulforaphane cannot be produced from vegetables that are cooked at a temperature above 158 degrees Fahrenheit. This is because the enzyme that helps create sulforaphane is deactivated when is heated above 158 degrees Fahrenheit.

The enzyme that helps create sulforaphane may also become less active in mature cruciferous vegetables, so it is uncertain how much sulforaphane you will actually get from mature plants. This is where crucifer sprouts save the day. Due to their increased enzyme activity, crucifer sprouts are the best source of sulforaphane. But one sprout, in particular, may provide the most sulforaphane of them all. That sprout is the broccoli sprout.

Where To Get Broccoli Sprouts

After seeing the benefits of broccoli sprouts it is tempting to add that $10 bottle of broccoli sprout capsules to your cart, but don’t let the tempting price fool you. At $10 per bottle, you are spending 20x more than if you bought broccoli sprouts in the store, and supplements can’t even guarantee that they actually have any sulforaphane or enzyme activity.

With store bought broccoli sprouts you can at least guarantee that you are getting sulforaphane in your diet. However, store bought broccoli sprouts will run you about $1 per ounce when you can easily grow them at home for the cost of ~9 cents per ounce.

With one 64 oz mason jar, a seed strainer lid, broccoli seeds, a glass bowl, and water you can grow up to 15 pounds of sprouts per pound of broccoli seeds. That means you can have a half pound of sprouts every week for over 6 months. Fifteen pounds of broccoli sprouts would cost you $240 if you bought them in the store or almost $5,000 in capsule form, and you can get them for less than $50.

How to Grow Your Own Broccoli Sprouts

Growing your own broccoli sprouts is simple and easy. It doesn’t require gardening skills, and after less than a week you can have up to half a pound of delicious broccoli sprouts for the cost of less than a dollar.

Here is what you need:

  • Organic broccoli seeds for sprouting (~$15 per pound)
  • A 64-ounce mason jar (~$10 per jar)
  • Strainer sprouting lids that fit the mouth of your jar (~$9 per lid)
  • A glass bowl
  • A cool, dark place
  • Optional: full spectrum light
  • Optional: salad spinner

Estimated yield: 3 tablespoons of seeds will most likely sprout to a half pound of broccoli sprouts in about 5-7 days.

Step by Step Guide to Sprouting Your Broccoli Seeds

Step 1

Put 3 tablespoons of broccoli seeds in your mason jar, cover the seeds with cool, distilled water or spring water (60-70 degrees Fahrenheit), and swish the water around gently. Put your mason jar, with the sprouting lid on, in a cool dark place for 6-12 hours to allow the seeds to soak.

Step 2

Drain off the water by tipping the mason jar to let the water pass through the strainer. Take the glass bowl and rest your mason jar inside of it so that the remaining water can drain. Put it in a cool dark place for 8-12 hours to let the seeds drain and sprout.

Tip: make sure the jar is tipped enough so that the seeds can drain and have adequate airflow. The most common cause of poor sprouting is inadequate drainage.

Step 3

Rinse the seeds 2x daily and put the jar back in the bowl in a cool dark place so it can drain. It might help to set reminders on your phone.

Here’s what mine looked like 60 hours after the beginning of the first rinse:

Tip: Try not to expose them to too much light until most of them are sprouted with tiny yellowish leaves.

Step 4

After 3 to 4 days you will notice white sprouts with tiny yellowish leaves coming from the seeds. When this happens for most of your seeds, you can begin exposing them to indirect sunlight or a full spectrum light bulb so that they can start to green up. Continue to do the same rinsing process as before.

84 hours after the beginning of the first rinse:

Step 5

After a day or two of light exposure, rinse them once again, and let them drain overnight. The next morning they will be ready to eat!

After the first day of sun exposure:

The finished product, about 6 ounces of broccoli sprouts from 2 and a half tablespoons of broccoli seeds:


Bonus Step: How to Increase Sulforaphane content by 3.5x

Studies have actually been conducted to find out how to increase the bioavaliability of sulforaphane from broccoli sprouts. One study found that If you want to get the most out of your broccoli sprouts, you must never expose them to temperatures greater than 70 degrees Celsius (158 degrees Fahrenheit). However, if you let them sit in 65 to 70 degree Celsius (149 to 158 degrees Fahrenheit) water for 10 minutes, you can increase sulforaphane content by around 3.5 fold. The greatest increase was found at 70 degrees Celsius (158 degrees Fahrenheit) with a rapid decrease when the sprouts were exposed to greater temperatures.

To try this broccoli sprout hack at home all you need is a pot, thermometer, a glass bowl, a timer, water, and your broccoli sprouts. Put your broccoli sprouts in a glass bowl while you heat up the water in the pot until it reaches 70 degrees Celsius. Cover your sprouts with the water and set your timer for ten minutes. Check the temperature of the water that the sprouts are in every couple of minutes and add 70 degree Celsius water to the broccoli sprouts periodically to maintain the temperature between 65 and 70 degrees Celsius. After 10 minutes, drain the sprouts, pat they dry, eat them, add them to a smoothie, or store them in the refrigerator.

If that description was to confusing, check out how Dr. Rhonda Patrick hacks her broccoli sprout sulforaphane content:

How to Store Your Sprouts for up to Six Weeks

To keep the sprouts fresh and nutritious for six weeks follow these steps:

  1. Eight to twelve hours after the final rinse and drain, pat your sprouts dry and/or use a salad spinner until the sprouts are reasonably dry. Nothing kills produce quicker than refrigerating it wet.
  2. Put the sprouts in a plastic bag or container that will ensure minimal exposure to air. If they are exposed to too much air they may dry out completely.
  3. Refrigerate them for up to six weeks and eat them whenever and however you like.

Enjoy!

Recommended Reading:
Sources:


Invasive Weeds You Can, and Should, Be Eating – Easy Foraging

If you’re a gardener, the single most time-consuming thing you probably do for your greens is to weed them. Unless you have a killer raised bed setup, the odds are good that your wimpy garden plants won’t be able to withstand the onslaught of weeds perfectly optimized to thrive in the conditions you’ve created.

Watching your kale get overrun by chokeweed is enough to make the most seasoned gardener despair, but what if the way you are thinking about these garden nuisances is actually completely wrong?

Weeds aren’t always bad. Ralph Waldo Emerson once famously proclaimed that weeds were simply misunderstood, as “…a plant whose virtues have not yet been discovered”. Though it might be hard for you to match his candor, the truth is that there’s a lot to like about common weeds that few of us are aware of.

As it turns out, weeds have far more benefits for our health than you can imagine.

Garden Weeds: Even Healthier Than Your Vegetables?

It takes a tremendous amount of effort to get garden plants to produce food. No matter how carefully you try to coax your tender plants to thrive, the odds are good that without some significant effort on your part, the close-growing weeds will soon take them over. While it’s easy to hate weeds for their effortless abilities to overwhelm your hard work, the truth is that the scrappiness of weeds is part of what makes them so special.

To understand this, keep in mind that every garden plant once started as a weed that was carefully grown over centuries until it came to resemble the plant that it is today. Fruits got bigger, inedible seeds got smaller, and unpleasant bitterness in leaves slowly became reduced. However, as the traits humans enjoyed best slowly became more prominent, the biggest benefits of these plants – their nutritional content – was slowly weeded out.

Wild plants don’t get the benefit of careful gardening to keep them alive, so they’ve adapted to defend themselves. For this reason, weeds are often full of phytonutrients, essentially an “arsenal of chemicals” that helps them fend off diseases and predators. While the bitter taste they produce often keeps the hungry away, these chemicals are full of health benefits for humans that help them fight off diseases like heart disease, dementia, and even cancer. Filled with vitamins and mineral levels that regular vegetables can’t compete with, garden weeds are truly more nutritious than supermarket greens. If you want the easiest, most efficient way to fill your diet with foods as close to nature as possible, chomping on wild weeds is a great place to start.

Types of Edible Weeds

The complete list of edible weeds is far too vast for any web article, but this list of common weeds from around the world should get you started.

Clover

You’ll find yourself lucky in a patch of clover even when four leafed varieties are nowhere to be found. Red clover is full of the phytoestrogen genistein, a substance that has been studied to treat colon and prostate cancers. While you might have to compete with the honeybees for your supply, raw clover can be chopped into salads or sauteed with other greens. However, there is some concern for pregnant women. Studies have shown that the large amounts of the phytoestrogens in clover may increase your risk of breast cancer and possibly birth defects.

Lambs Quarters (Goosefoot)

Young, tender, and very versatile, lambs quarters can be used as a substitute for spinach in any recipe. This is great news for salad lovers, as lambs quarters peak right when spinach is winding down for the summer. Loaded with vitamins A, C, and K and full of calcium and protein, you are actually better off eating this wild spinach over the cultivated variety. If you are filled with patience, the seeds from lambs quarters can also be collected and cooked as a quinoa-like grain filled with 16% protein.

Dandelions

Though you might cringe at the sight of their sunny-hued flowers blanketing your lawn, dandelions are actually nutritious and surprisingly delicious when used well. In fact, European settlers first brought the dandelion to the U.S. for use as a salad green. One cup of raw dandelion greens contains well over your daily needs of vitamin A and vitamin K.  The best ways to eat dandelions tends to be raw in salads or dried into herbal teas. For those feeling a little more adventurous, the yellow flowers can be breaded and fried for a tasty snack.

Catnip

Not simply a treat for cats, catnip actually has some fascinating health benefits for humans, too. Native to Europe, catnip easily grows around the world and makes for a great herbal tea that encourages relaxation. The mild mint flavor is tasty when snacked on raw or sauteed with other greens

Plantain

Though it has little resemblance to the tropical fruit with the same name, plantain weeds grow all over the world and make for a stellar medicinal plant that can be used topically to soothe skin ailments like rashes or burns. Even better, the younger leaves are tasty in salads and can be steamed, boiled, or sauteed. If you take the time to harvest the seeds, they can be ground into a nutritious flour that’s great for baking.

Bamboo

Though bamboo’s versatility has been put to use on everything from flooring to kitchen cutting boards, few people are aware that this fibrous plant is also edible. Often described as tasting like corn, bamboo shoots can be harvested when they are less than two weeks old and added to your favorite stir fry. Simply peel off the outer leaves and cut the tender middle into one-eighth inch slices before boiling them in an uncovered pan for twenty minutes. After the bitterness has been boiled out, you can eat bamboo any way you choose.

Garlic Mustard

Though it’s highly invasive throughout much of the world, garlic mustard originally came from Europe. The flowers, leaves, seeds, and roots of garlic plants make them great for weight loss and controlling cholesterol levels, and their faint garlic scent makes them a tasty addition to any dish. You can harvest garlic mustard all season long, but the tastiest roots need to be collected in the early spring.

Green Amaranth

Similar to lambs quarters but with a more mild taste, green amaranth is also known as redroot, pigweed, and wild beet. Because of the detergent-like qualities of the saponon on raw leaves, green amaranth is best cooked before eating to eliminate the strange aftertaste. For this reason, it’s often best to serve green amaranth with a stronger tasting vegetable to offset its mild flavor.

Watercress

There’s no avoiding the high price tag of watercress in classy grocery stores, but you can harvest it yourself for free. This weed can be found throughout the U.S. Adding it to your salads is a foolproof way to boost up your daily antioxidants.

Kudzu

While “the weed that ate the south” is a symbol of despair for millions in America, this voracious plant is actually edible itself. Simple to make into jams and jellies and tasty when the flowers are pickled, there’s a lot of ways to experiment with this tricky vine. Commonly used as a digestive aid in China, you can also chop up a cup of kudzu leaves and boil them for thirty minutes before drinking the health-infused creation.

Mallow (Cheeseweed)

Common to see in yards around the world, mallow is a blessing for adventurous eaters to enjoy. Both the leaves and seed pods are edible and can be enjoyed steamed, boiled, or raw as a salad green. Mallow is full of vitamins and minerals that make it useful as an herbal medicine, especially when used as an anti-inflammatory, diuretic, or laxative.

Purslane

If you only choose to eat one weed from your garden bed, purslane should be the one. This succulent looking plant grows close to the ground and in between the cracks of the sidewalk. If you find some, you’re in luck. This juicy, lemon-tasting green is filled with omega-3 fatty acids. It is tasty eaten raw, cooked or blended in a smoothie. Because every part of the plant can be eaten, you won’t have to worry about shoving it all in your mouth at once. As an extra benefit, purslane consistently produces a bumper crop of edible seeds, which can be used for baking. All you need to do is dry out the seeds for several weeks on a sheet of plastic before winnowing out the tiny, black seeds.

In Summary

The benefits of spending your summer days wrist deep in garden dirt cannot be underestimated, but there’s a lot you can do to enjoy fresh grown produce without the effort. Garden weeds are equipped to thrive where your vegetables suffer, and most of them actually contain more vitamins and minerals than conventionally grown produce. If you’re ready to enjoy the benefits of these long-valued “famine foods”, give your garden weeds a try and see how they make you feel. You might be amazed at the results.

Related Reading:
Sources: